Tuesday, March 31, 2009

And the Buggy has a new home...

Last night we touched up all the red paint.  This morning, it was moving day for the buggy. We need to clear it out of the garage so we can prepare for our Yard Sale this weekend. Ultimately, the buggy will live outside anyway.  We just wanted to make sure that it was painted and rustproof before subjecting it to Florida weather.  Steve put the front end back on so that we once again had a rolling chassis.  


After Steve attached the front end, I put the wheels and tires back on all by myself!


Steve put the steering back together.  Elwood napped...


Next, I got in and got to "drive" it, Flintstone Style!  We put it in the back yard and there it will sit for a while until we get rid of our stuff in the Yard Sale.  


Thursday, March 26, 2009

From a Project to a Product...

This week was painting week!  We had a couple great weather days and decided the time is now.  We picked up the paint from a shop in Orlando and got right to work.  Here is a photo of the primed frame.


          The Paint "Kit"

We had to roll the bedliner paint on which was quite a chore with the texture and all.  Amazingly, we got one really good coat on before the sun went down that day.  We should be all finished with the painting except for a few touch ups here and there.  


      This is tough stuff!


 Steve just showing off 
 
Turning it upside down to get the bottom


       A closer look

 PS I kinda outgrew my painting clothes!  :)

Thursday, March 19, 2009

Now we are really having a Blast!

As we mentioned before, we are almost ready to paint the buggy.  We wanted to have it sandblasted before priming it though to get some of the welding slag and surface rust off the steel.  Ultimately, we ended up having it media blasted today which is apparently very similar to sand blasting except with a different media.  The media choices are sand, crushed-recycled glass, walnut shells, baking soda, crushed corn cobs, and various other types of ingredients with varying grits and hardness.  We chose soda.  No, not Coca-cola, but baking soda! It is environmentally friendly and because it is a finer grit, we were able to do some aluminum pieces as well.  It can also be sprayed with a little water so it keeps dust to a minimum and keeps everything nice and cool.  We found a local company that comes right out to the house and does all the dirty work.  Don't worry, Elwood still supervised the event to make sure everyone did a good job.  The next step now is to prime and paint the steel.  We have a short window of time with which to do this before the good old Florida humidity starts to rust the steel again.  Here are a few photos we took of the SodaBlasting today.
  
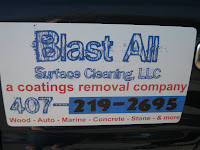
A plug for Blast All, the company who did all the work.  A little trivia the man told us, this type of cleaning was invented in 1972 for cleaning the Statue of Liberty.  Apparently you can clean copper the same way!

 
The equipment...we don'mess around!

 The buggy is ready.
We removed the front end and wheels because we already painted it back when we took it off the donor car.

      
                                                        The "Supervisor"

          About to be chased 
                             by the Soda Cloud

     
The before and after wheels.  What a difference! 
We aren't using these wheels on this buggy.  
Hopefully we can use them when we build 
Jen's "Barbie Beach Cruiser" someday which 
will of course be all pink!

 He was pleased with the work.


After about an hour and a half, 
our leader was getting tired and bored.

 "C'mon already!"

All clean and back in the garage...


Tuesday, March 10, 2009

Dune Buggy 2009 Update

Well it has certainly been a while since we blogged about the dune buggy progress but have no fear, the project rolls along.  We have decided that at long last the buggy need not be naked anymore, and it is time for some paint.  We think we have decided where everything is going to go such as seats, mirrors, lights, etc and have completed all the appropriate welding for those items.  The next step is then, to paint it.  We have decided to paint it red to optimize visibility since it lacks a body.  We have also chosen to use bed liner paint used in truck beds for extra durability.  We have ordered the paint but there is a little prep work involved before we can actually paint the buggy.  Our project this week was to remove everything from the buggy we had spent the last year building.  That's right.  Take it all apart!  I have to say, it was a little disheartening to realize that a year's worth of work could essentially be "undone" in a matter of two afternoons.  Oh well.  We did it and now we are on to the fun part...Painting!  Here of some photos of the "demo" we did before painting.

                         
Jen, taking out the center and dash consoles


 The "naked" buggy in the driveway

    
We decided to flip it over to take off the floor


God-willing this is the last time the buggy is in this position!

             Floor all gone

          
 That is not an illusion, the buggy frame is bigger than my car!

 Stripped down to it's frame 
  
 The floor pan. We are painting it black with 
the same kind of paint.

Next, we will put everything back on, hopefully not have too many left over pieces, wire everything, install motor, and cruise.  We have also purchased the new wheels for the finished product but are still in search of the perfect tires tires for them (in other words, cheapest).